Tuesday, February 21, 2012

D1 - Tutorial #2 - Raechel Bible


adding make up to a face

1. open up the photo in photoshop. 


2.start a new layer. in the panel on the right, at the bottom right corner next to the trash can, there is an icon that looks like a page being turned. select that and it will create a new layer. 


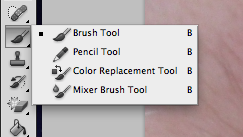
3. choose the brush tool from the panel on the left. then select the icon for the foreground color and a new window will open. from here you will choose the color you would like to use.


4. open the options for your brush. choose a soft brush, set the hardness to 0%, set the opacity to 100% and make sure mode is set to normal. the size of the brush will vary depending on the photo or what your are applying color to.


5. zoom in to the area where you will be applying the color. start applying!


6. select the eraser tool. set the opacity to 10% and leave the hardness at 0%. use the eraser around the edges of the color. this will make them smoother.


7. change the blending to overlay. you can also choose the blur tool to smooth the edges of the color even further if you think it's necessary. 


8.  select image, adjustments, hue/saturation. when the windows opens, lower the saturation and the lightness.


9. turn down the opacity till you are satisfied with how it looks.


10. when you are finished editing your photo, go to Layer, then Flatten Image.


11. Tada.


D1 - 27 minutes to post tutorials

D1 Tutorial 2 Sara

We've learned in class about using the clone stamp tool to cover blemishes but today I decided to practice/teach how to apply eye makeup to a bare face.

So I start with a close up of a eye without any makeup.


As always make sure to create a duplicate layer just in case something goes wrong.


Then go to the left tool bar and select burn. We will be using the tool to create a darker shade on the eyelid.
Make sure to lower the exposure so we just lightly shade a little at a time.
Nothing extreme we will be adding other layers of color.
Now go to the brush tool. Select a rich brown and like earlier adjust to exposure. You might find yourself stepping backward a couple times until you get it the way you like it. Not too strong but obviously there.


Now sticking with the brush tool. Make the size smaller, we are going to create eyeliner. I used 10 pixels but the size you will need will depend on the size of your picture. You also probably want to pick a darker brown or black for the color and adjust the exposure to make a darker line.

 While you're at it touch up the eye lashes a little. I didn't go heavy on it because when I tried to make thick eyelashes they looked really strange.
Now choose the blur tool and blend the tones on the lid. Be careful this is easily overdone.


 Now you can stick with the brown for a natural look. I decided to save the above picture just in case the next part goes wrong but I wanted to add more colorful eyeshadow. Start by creating a new layer.

 Now I picked a nice green for the base of it and using similar adjustments to the brush as earlier. ( Decent size brush and 15-20 exposure) and I went over the base of the lid where the darker brown is.

 Now select the layer of green and give it a layer filter of soft light.
Do the same thing with a light green over where highlighter eye makeup should be. Do this on another separate layer and select darken


And here is the final product.  Hope you enjoyed and learned.
\

D2 - Tutorial #2

How to convert a stroke path into a shape.


First make a stroke, I used a brush style that I downloaded from the internet so it looks more like a real brush stroke.


Now select the stroke path with the Selection Tool


With it selected go to Object>Path>>Outline Stroke


Now instead of having a single path, the stroke is outlined with multiple anchor points.


Now you can manipulate it to fit better in whatever you are designing....


..or just go bat crap crazy.

D2 Tutorial-Easy 3d Text Illustrator Tutorial

This is a simple tutorial, showing you how to use the 3d extrude filter to make some quick 3d text. Start off by clicking on the type tool and inputting some text into your canvas.


Click Type Menu to edit the font and size of your word.


A new window will pop up with quite a few editable variables. You can choose to input these manually, or simple grab onto the 3d box with your mouse and rotate it until you have the desired perspective. To change the length of the extrude, adjust the Extrude Depth.


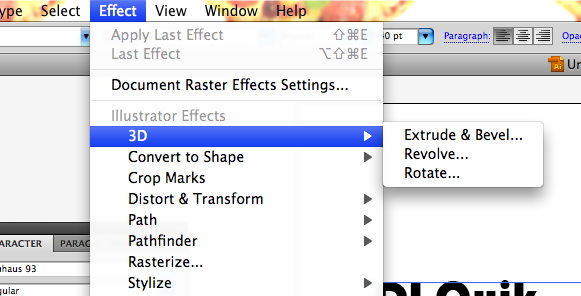
To add a quick dropshadow, choose Effect > Stylize > Outer Glow


Add a glow with a varient of whatever color you chose for your text, lower the opacity to 50% and click ok.

D2 tutorial #2 Couple way to use the pen tool- j Clark

well i still am not sure of all the ways that you can use the pen tool. but since we discussed it in class and Aaron said that its a tool we definitely needed to know how to use.. i decided to use what Ive learned from my digital publishing class on the what little i know about the tool as my tutorial.

1. you can use the pen tool to draw or trace over and object for example. (as you can see the blue dots around the B image i traced, or the image i drew)


2.)  ( all you have to do is click on the point and continue to follow the design your tracing over or continue to click until you have created your own image.

3.) after doing so, let say you were creating text with that you can either use the direct selection tool or by adding another point you can manipulate the text. ( to add a point you click on the pen tool that has a plus by its tool image.)


4.) you can also take points away by clicking the pen tool image with the minus sign.
5.) i do like using the brush tool to trace over things, but as far as if you really wanted to make sure your trace is in tune with the image this is definitely the easier way to me.... rather than having to draw using a mouse which is tricky at times.

6.)  and also when dealing with the curve of an object you'll get what is called a handle which u can rotate to the right or to the left and it will make your line you created with the tool curve accordingly.
 so far this is all Ive learned about the pen tool, i know its not a lot....but hopefully what i did on my tutorial over the tool will be of little help or set a little foundation for all the functions it can do....