Thursday, March 31, 2011

How To Create A Smokey Image Effect


Open your photo and select the background using the Quick Select Tool or Magic Wand.
Go to Select > Inverse to invert the selection, then make a duplicate layer.

Click on the Background layer, and fill it with black.

Desaturate this layer by going to Image> Adjustment> Desaturate. Then use Filter > Stylize >Find Edges to create a sketched line effect. Next invert the color and the line color will turn white.

Now select Filter > Blur>Gaussian Blur. Adjust the Radius value to around 6px, click OK to apply Gaussian Blur Filter. Remove any unwanted areas.

Still using the same layer, adjust Levels. Adjust the shadow, midtones and highlights values to increase the image contrast so that the black area gets darker and white area gets brighter. Now you are ready to add the smoke. I found free smoke brushes here: http://photoshoptutorials.ws/photoshop-downloads/photoshop-brushes/real-smoke-photoshop-brushes.html

Pick the Brush Tool and click the Menu button from the preset brush picker and select Load Brushes. Find where you saved the smoke brush and select it by clicking the Load button.

Duplicate Layer 1 by pressing Ctrl+J, then change the blend mode to Screen. The white lines are supposed to be brighter right now.

Create a new layer on top. Still using the Brush tool, choose one of the smoke brushes. Create the smoke shape with one click making sure the brush Opacity is at 100% and the brush color is white.


Resize the smoke and reposition it however you like. Now you need to warp the smoke so that it follows the shape. Erase unwanted smoke parts if needed. To reshape the smoke:

1: Use the Smudge Tool with 30% to 50% Strength to push and pull the smoke to outline the shape. Using the smudge tool will also blur the smoke.

2: Go to Filter> Liquify. Use the Warp Tool to push and pull the smoke to outline the shape. It helps to check Show Backdrop ON, and set Opacity to100%. You may have to try this a few times to get it right.

Use both these steps until you get the smoke exactly how you want it to look. Remember to create a new layer each time you add new smoke.


Now you want to add some depth by adding some clouds in the background. To do this, create a new layer between the Background Layer and Layer1. Set the Photoshop default color by pressing D (the foreground color should be set to black and the background color should be white). Go to.Filter> Render > Clouds. The clouds should be transparent so this will have to be adjusted. Go back to Layer 1 and change the blend mode to Screen. You may also erase some of the clouds to get the look you want.


You can also make the clouds look like they are fading by going back to Layer 2 (the cloud layer) and add a Layer Mask. Use the radial Gradient tool to do the masking.

I also added some color using a Gradient Fill layer above all the other layers. In the Gradient Fill dialog, adjust the gradient color, angle, etc by clicking on the sliding markers below the gradient color bar. Click OK to apply gradient color.

.Now to add some glitter effects. Using the Brush tool, click the menu button from the preset brush picker and choose Assorted Brushes. Photoshop will ask you to replace the current brush, choose Append. This will add the assorted brush to the list.

Create a new layer named Glitter and place it below the Gradient layers. Using the Brush tool, select the starburst looking brush and decrease the Diameter size to around 30px. Show the Brushes panel by double clicking Brush Presets ,and increase the brush spacing value to around 190%.

Select the Shape Dynamics option. Increase the Size Jitter to about 35% and Angle Jitter to 100%. Check the Flip X and Y Jitter option. Now go to the Scattering option and increase the Scatter to about 540% and Count value to 2.

Make sure you are in the Glitter Layer, choose white as the

brush color, and then paint the glitter effect across your image. If you want to give the glitter a more blurry effect

. select Filter > Blur> Gaussian blur and set the Radius at about 0.9px. Then reduce the Glitter Layer’s opacity to 38% so it will look see through. Flatten image and save and you're done!

Here is my finished image
D1 Tutorial #4 Sijan

Effect of music notes on the flower.

1. Open the picture of a flower you would like to add music notes to.


2. Now, sharpen the image by Filter>Sharpen>Smart sharpen.

3. Improve the contrast using Image>Adjustments>Brightness/Contrast

After all the adjustments, the picture looks like this.

4. Open the image of a music notes.

5. Now copy the image of the music notes and paste it in the first picture where you have the flowers. If the picture of the notes appear smaller than the size of the tulips on the flower, you can paste the picture of the music notes twice and then merge the two pictures together.

6. Change the layer mode to Darken.

7. Now to expand the image we use Edit>Transform>Wrap.

8. After you adjust the notes on the petals, use polygonal lasso tool to create petal shaped selection. Then hit ctrl+shift+I to inverse the picture. You can then hit 'delete' which will delete the rest of the part except the petals.

9. You can use the same process to all the other petals where you would like the notes to appear.

Final Image :


D1 Tutorial #4 Jami Turner


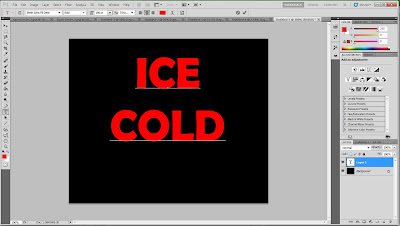
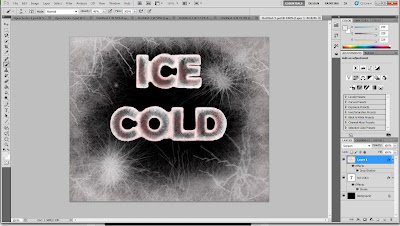
My tutorial is over adding an ice effect to text.

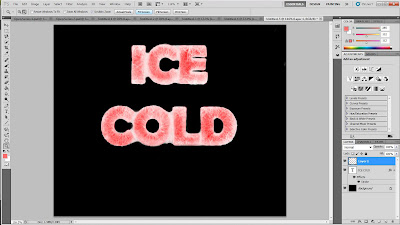
Step 1: Choose the font/font size. I made the background black so that the ice will stand out when it's complete. I also chose a fatter font so the ice will have more detail, and made the text red so that there will be a little red hue in the ice.

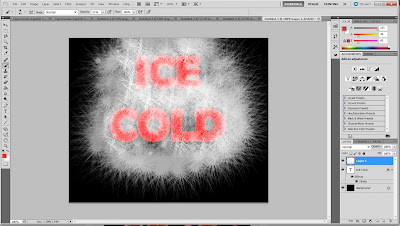
Step 2: I fattened the font a little more so that it would be more rounded and natural looking. I then went into the brushes, and clicked the little black arrow beside the master diameter. I then chose a brush that would give me a cracked ice look. You can download other brushes if you wish.


Step 3: Next, I made the color for the brush white, and used different diameters for different sizes of cracks on the text. Set the brush to low opacity so the cracks look more natural.


Step 4: Get rid of all the cracks around the text that you don't want. I used the eraser tool.


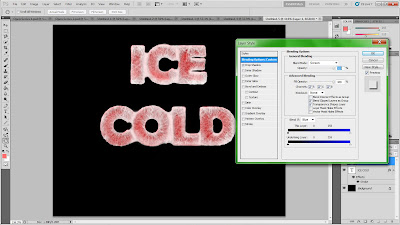
Step 5: I then went to Layer>Layer Style> Blending Options. On the left I chose the 'drop shadow' option, and under 'blend mode' I chose 'screen'. This gave the text a little more dimension.


Step 6: Make the ice a little more "ice-like". I used a basic brush with soft edges on low opacity, selected a dark color out of the text, and got rid of some of the red so that it looks more like a red light that is being cast on the surface. I then chose white, and went around the edges of the text and where the letters connect to each other, to make the letters look like they are frozen to one another.


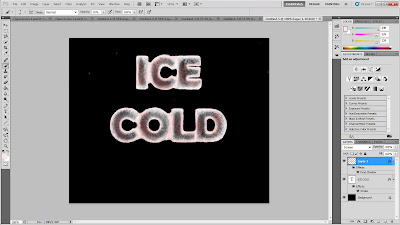
Step 7: After all this, I used the special brushes again on low opacity to get a cracked icy effect around the text as well. This isn't necessary, but I wanted something surrounding the text so that it wasn't as plain.

dig1tut4brenna

How to make a polaroid collagebackground-copy-layer.gif

new-blank-layer.gif
color-swatches.gifthe foreground of layer 2 fill black.
filled-with-black.gif
layer-3.gifcreate layer 3
drag-selection.jpgmar
layer-3-thumbnail.gifmarquee tool for selection

clipping-mask.jpg
layer-1-clipped.gifmake clipping mask
layer-4.gifadd a layer4 to be the white border
drag-selection-2.jpg
first-polaroid.jpg
layer-styles-icon.gifadd drop shadow
select-drop-shadow.gif
drop-shadow-options.gif
two-layers-selected.gifconnect layers 3 & 4 & layer 1
rotate-polaroid.jpg
select-three-layers.gif
layer-group.gifestablish a group for the polaroid
drag-group.gifdrag group to new layer for new polaroid
group-1-copy.gif
group-1-2-layers.gif
drag-second-polaroid.jpg
final-result.jpg