How to Make A Shooting Star

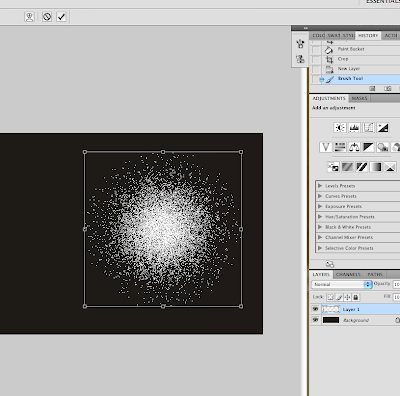
Start with a black background so you can easily see what you're working with..
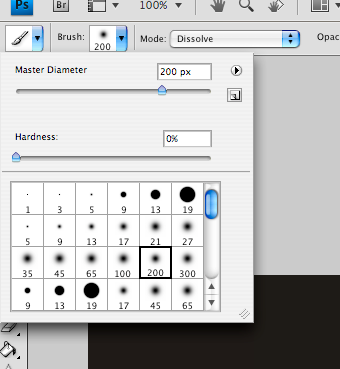 Select a large soft round brush
Set the mode to Dissolve
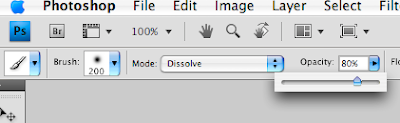 and lower the opacity.
Create a new layer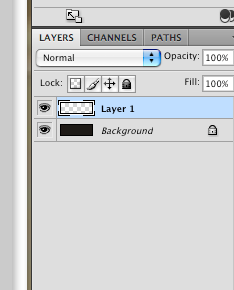
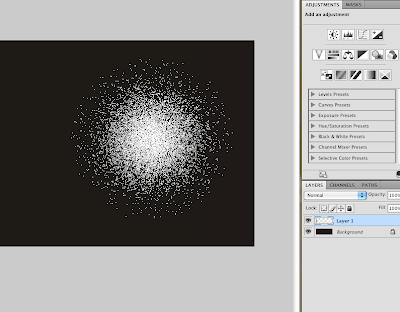 and make a single brush stroke.
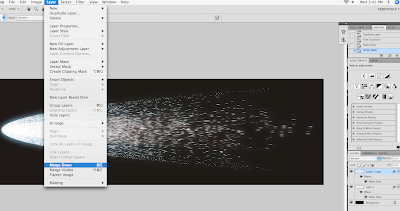
Type "Apple Key"+T to free transform the image. While in Free transform, click the warp button.
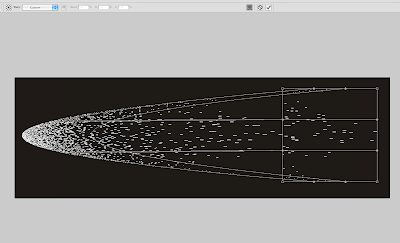
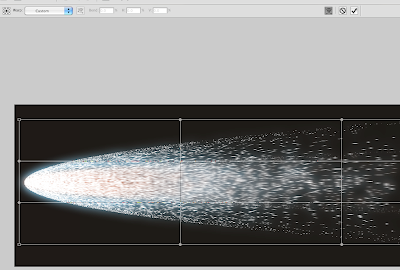
Click and drag the center of the center square on the grid to the left.
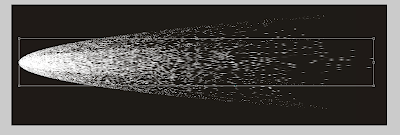
It should look like this.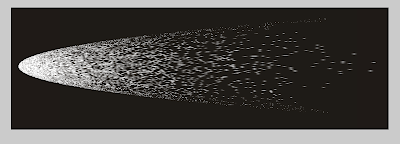
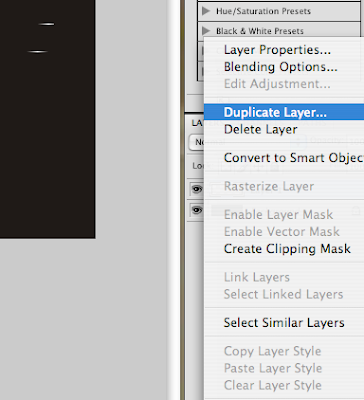 now duplicate the layer.
Free Transform, hold Alt, and re-size the image to create a second smaller flare or tail within the first.
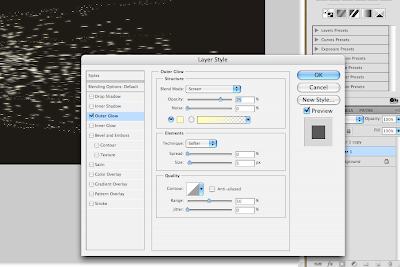
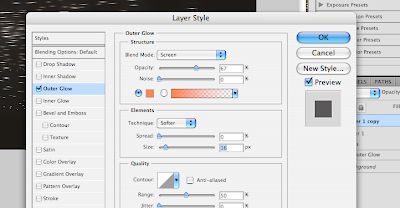
Go back to the first layer, open the blending options and select outer glow.
Change the color of the outer glow to a cooler color...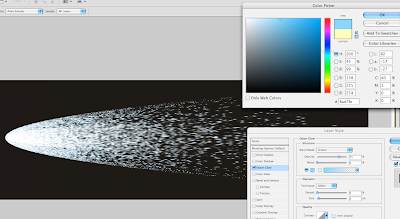
 And increase the size.
Go back to the duplicate layer and do the same thing but make it a hotter color.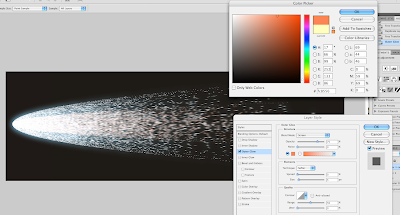
now merge the two layers together (not the background)
Using free transform and warp again, pinch the nose of the shooting star to make it a bit narrower by clicking and dragging the two points at the nose towards each other.
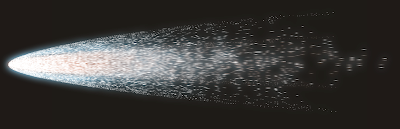
Now you are ready to copy and paste it into space.
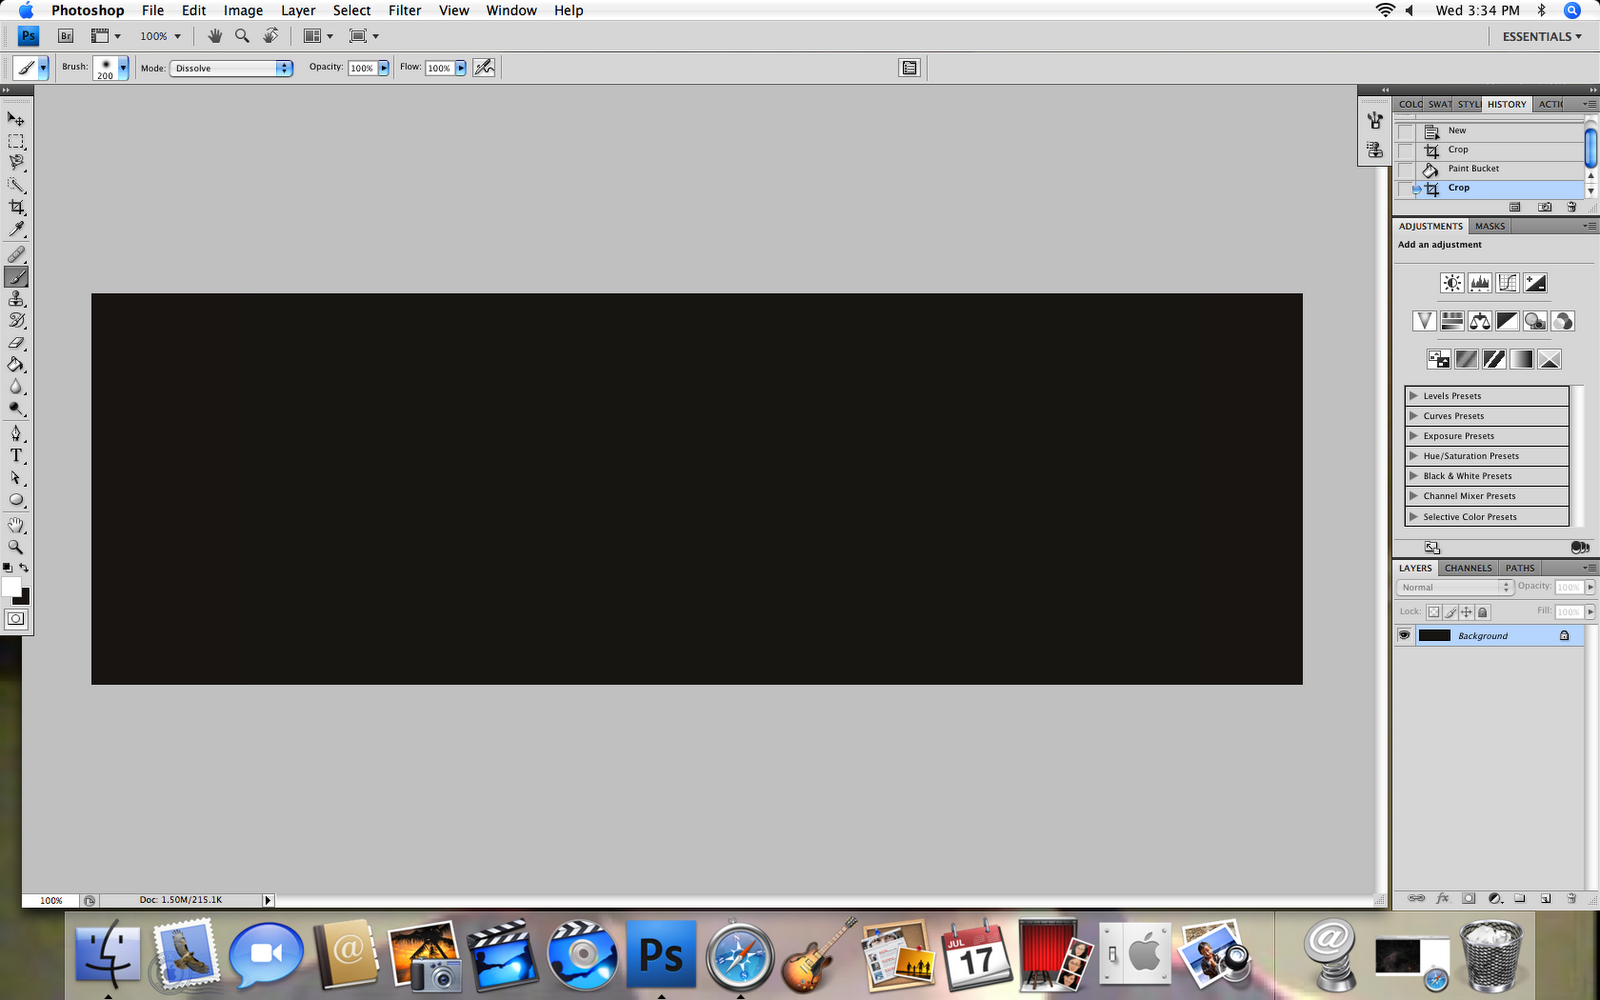
Start with a black background so you can easily see what you're working with..
 Select a large soft round brush
 Set the mode to Dissolve

 and lower the opacity.
Create a new layer

 and make a single brush stroke.
Type "Apple Key"+T to free transform the image. While in Free transform, click the warp button.

Click and drag the center of the center square on the grid to the left.
It should look like this.

 now duplicate the layer.
Free Transform, hold Alt, and re-size the image to create a second smaller flare or tail within the first.


Go back to the first layer, open the blending options and select outer glow.
Change the color of the outer glow to a cooler color...

 And increase the size.
Go back to the duplicate layer and do the same thing but make it a hotter color.


now merge the two layers together (not the background)

Using free transform and warp again, pinch the nose of the shooting star to make it a bit narrower by clicking and dragging the two points at the nose towards each other.

Now you are ready to copy and paste it into space.
3 comments:
awesome as always Dinah! :)
Thanx Amie! X)
Nice!
Post a Comment