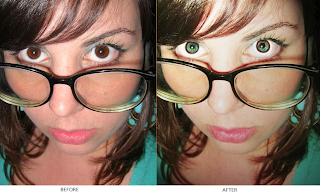
Have you ever wanted to change someone's eye color?
The following is a tutorial that will show how it. Hope it helps!
Step 1
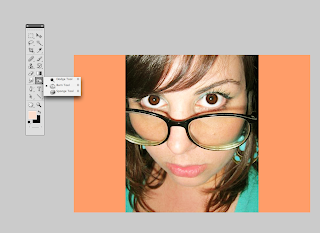
Choose a photo you'd like to work with. Use the Burn Tool from the menu and change the range to "midtones." Make sure the opacity is set at a light to medium. Now you can begin by burning the outside edge of the iris, and some of the pupil, if needed.
Step 2
Now choose the Dodge tool, making sure the range of opacity is at a light to medium setting. Make sure the range is set to midtones. Now use the Dodge Tool to lighten the inner area of the iris. Make a starburst effect, or "rays" along the outside inner edge by using the Dodge Tool with the brush size set to a 5.
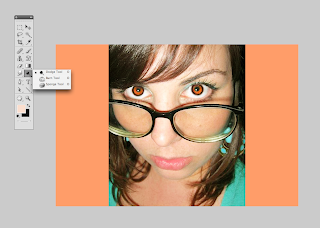
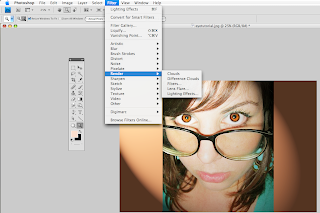
You can adjust the lighting for a more dramatic effect. Go to Filter, scroll down to Render and choose Lighting Effects. Once in lighting effects, you can now mess around with the lighting choices.
Step 4
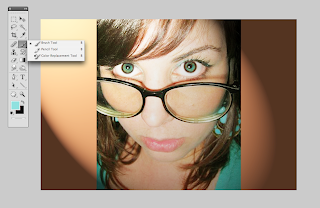
At this point, it is now time to change the color of the eyes. It is best to do this on a new layer. Also, make sure the new layer is selected when recoloring the eyes. Now, go to the Brush Tool and select it. From the color palette, choose any color you wish and make sure the opacity of the brush is fairly low. Lightly brush your new color into the inner area of the eyes.
Step 5
Using the Dodge Tool again, lighten the recolored areas for a stronger effect. If needed, also use the burn tool to darken any areas you think may need it.
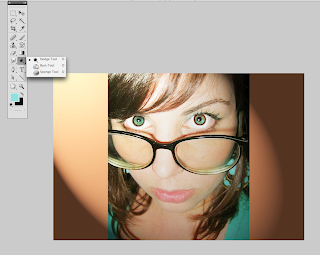
Step 6
To adjust the coloring of the photo more, go to Layer, scroll down to New Adjustment Layer, and choose Selective Color.
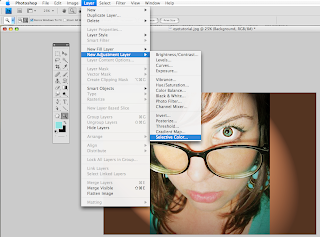
Step 7
A pop-up box will appear. Click OK.
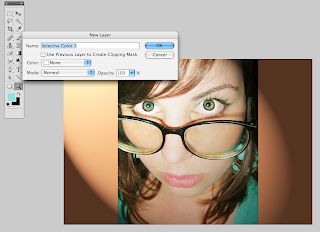
Step 8
To the right of the screen there is an Adjustments box. You can now choose a color you wish to enhance or downplay. In this case, I wanted a bit more red in the photo.
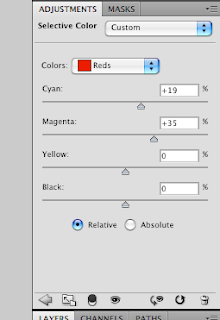
Step 9
After you are done with the adjustment layer, you may at this time choose to "tweak" the photo by adjusting lighting or contrast. Any other adjustments should be made at this time also. Once you are finished with your adjustments, go to Layer and scroll down to Flatten Image. Click on it, merging your layers into one.
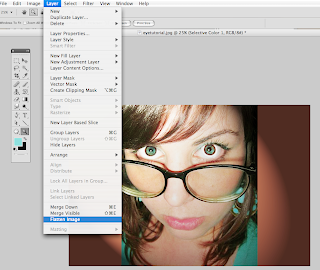
You're done! Don't forget to save it!
2 comments:
I will keep this in mind if I'm ever on the run. Good tutorial
Yes I like this tutorial but for some reason the final image kind of looks like you are a little cross-eyed to me.
Post a Comment