I took a series of pictures of my workspace from three different points in the room over the whole semester. This is the compilation of those pictures. If it was not so frustrating to try to get this stuff posted, I would try to post pix from just one point. With the software quitting mid-operation and all the different stuff happening to the computers in the lab, I just am getting very tired of this project. :( Pamela
Showing posts with label Disclaimer. Show all posts
Showing posts with label Disclaimer. Show all posts
Wednesday, April 27, 2011
Second attempt D1 Passage of Time Filipelli
Okay, here goes . . . OMG, I just previewed it. I'm motion sick. It gives a 360 degree effect.
Thursday, April 7, 2011
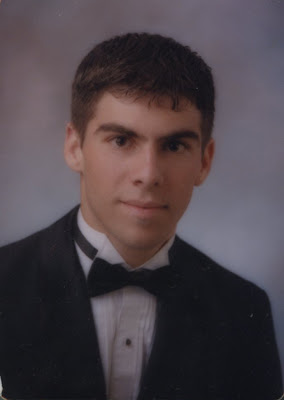
D1 Tutorial #3 Filipelli
In this Tut, I will show how to turn my beautiful son's senior pic into a monster.
Start with your scanned pic. Download monster parts in layers for adding to the
pic from http://av.adobe.com/russellbrown/MonsterMakeup_SM.mov .
Make a copy of the original pic as a background copy layer. Select, copy and paste each part over the face where you need it. Adjust size, distort or warp the pasted part 'til it fits your subject. Go to your background copy face and make the skin tones more green by
cloning the green from other layers onto it. Copy any clothing that has to overlap
the green monster parts and paste into a layer that can be moved above the monster layers as needed. Adjust color on any stitches or staples by selecting the part you want lighter or darker and pasting it into a new layer to change the value. Put that layer above the original layer with that monster part. Check that it looks "right" then merge your layers. There you go.


Subscribe to:
Posts (Atom)