Thursday, March 31, 2011

D1 Using layer mask. Guillermo

this time im going to show you one of the many things you can do with layer masks and that is using the layer to erase.

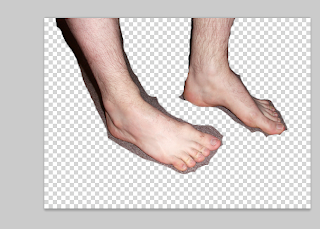
Im using this image and im adding the layer mask to this layer.


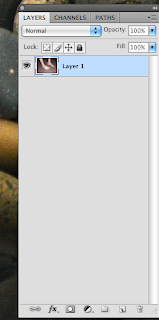
now im gonna add the layer mask but first make sure you have the layers pallette.


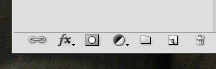
down at the bottom of the layers pallette there are some options


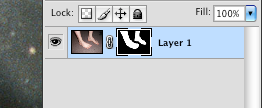
click on "add vector mask"


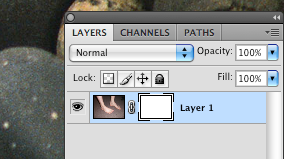
now you layer should have this next to it.


make sure the white rectangle is selected and then use the brush tool to remove what you dont need. when using this make sure you are using black not white, since black works as an eraser and white to reveal portions of the picture.


this is what it looks like at the end, the original image its still intact.


thanks for you time!

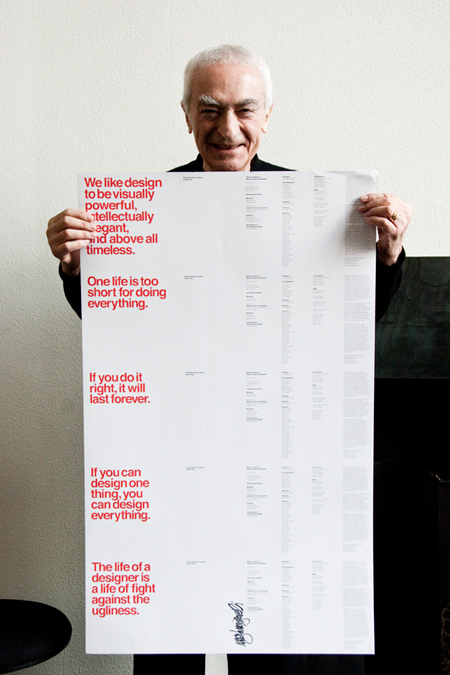
The Five Vignelli-isms


I found this on another blog, these are very true, useful and good reminders for any designer.

For the full article check out, ISO50.
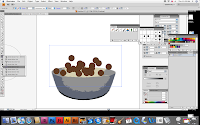
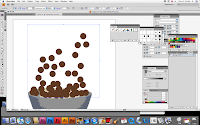
Here is a tutorial for using the symbol sprayer to create cereal.
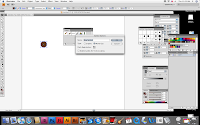
First use the ellipse tool to create a circle.


Then to make it look more like cereal I went to the effect drop down menu at the top of the screen and selected the texture option which brings out a drop menu and i used the texturizer option.


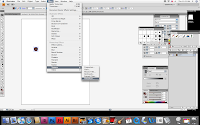
Next find the symbols box if it is not on the screen go to the windows menu at the top and click the symbols. on the box on the lower right there is a new symbols option next to the trash can. Click it and it will create a new symbol.


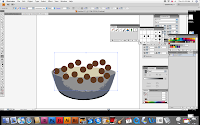
I found a cereal bowl on the internet. I then click on the symbol sprayer button on the tool bar. looks like a spray can. I sprayed the little balls until I thought I had enough.


If you hold down the mouse on the symbol sprayer tool more options will come out. If you click on the symbol scruncher option you can move the balls closer together so that they are not all over the place.


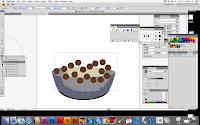
Next take the Symbol Shifter tool and move the balls around the bowl to spread them out.


I used the Symbol Spinner tool to shift each ball in a different direction to make it more realistic looking.


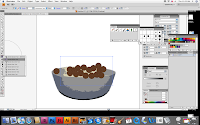
I then sprayed some more to make it look as if the cereal was being poured into the bowl.
And there you go.


J Clark just FYI

i know since i'm new with the whole photoshop thing i tend to use tutorials a lot to teach me how to do functions that i would like to be able to do in photoshop... and as far as the voting  i noticed a lot of people in class decided they wanted to use flash... well looking around i found this website with some flash tutorials.. something to maybe glance at...
http://www.good-tutorials.com/tutorials/flash/animation
Google today: 


D1 Tutorial #4-j. Clark

In this tutorial i'm going to teach you how to make a picture (whatever it might be) look like a room.
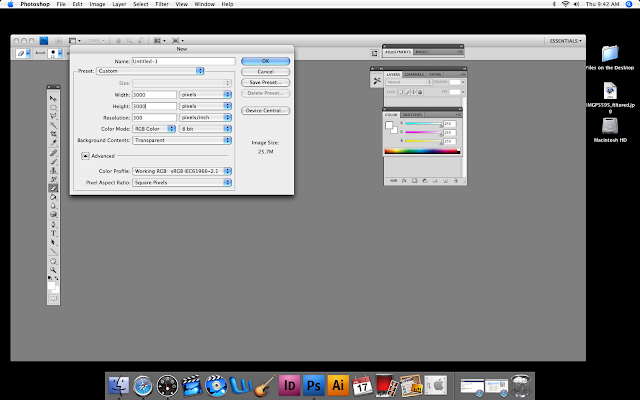
1.Create a new file with these settings: 
  • Width: 3000px   
  • Height: 3000px   
  • Resolution: 300 dpi   
  • Color Mode: RGB Color; 8bit 
  • Background Contents: Transparent
2.)open the picture you would like to use for the sky, select the marquee tool and select the part that you want to appear in the picture. after you select what you wanna use we have to resize the picture to fit numbers in step one. (select ctr r and resixe the image to 5.3 on the top ruler)
 you should have an image that looks like this.
3.)activate you marquee tool and select the left side of the image to make one side of the box. then go to edit/ transform/ and distort. once you do that take the bottom left corner n drag it all the way down to the corner.

4.) repeat for the opposite side.
5.) optional! now we have to create the texture for the walls. to do this we have to create a new layer. after we create a new layer we use the brush tools to give it texture. this step is optional depending of it you want to put texture.

6.)now find the next picture you want to use for the bottom of the room.
make a new layer and place in under the layer we've already created.
7.) now the rest is all about what you want to add to your room. if you want to add images to the wall or on your floor its completely up to you. if you dot know how to place images into the room.. you make a new layer place you image onto it where you want it on your picture. turn the opacity down. and use the lasso tool to draw around the image you want. (make sure you layer/ smart object/ rasterize) after that copy and paste and you can delete your layer and your image should stay there.
8.) so after you finish  adding everything you want you'll have you finished product.. 


D1 PC Keyboard shortcuts for Photoshop!


See this site for a bunch of PC shortcuts for Photoshop. It's one of the sites I've been looking for all semester. I'll try to find the same for Mac. Pamela

D1 Collage Filipelli


Here are my collages.


Thank you Samantha for posing for me!

Human Camera

http://www.stumbleupon.com/su/2MBBxU

This is not exactly digital art, but the guy is like a computer. So, I figured it fit in this blog somehow.

D2 Tutorial #4 Pina

Ok for this assignment we're working on we're using boxes and not all of them are perfect shapes so to fill them in it took some time. Here is a time saver I figured out on my second box that I wish I would've done on my first one:

1. Here is my box that I'm using:


2. Make sure before using any shapes or tools that your fill and your stroke are the same colors so you can't see any lines.


3. Ok so I just started out by using the shape tool and making a square, as you can see it didn't fill it all


4. So I clicked on the brush tool


5. and I finished off the shape with the brush tool


6. Now you just alt+drag your shape to copy


7. Now that you've copied it just left click, go down to Transform, and click on Reflect...


8. A box should pop up and you can go ahead and put the angle that you want to reflect it, mines was 90 degrees, and just hit OK:


9. Now just put it where you want it: 


You can do this with all the shapes in your box, they'll be different shapes but you can use the same steps. Also after I did one box with the all the shapes in there I just copied and pasted it on a new page for my competitors box and changed colors and messed with it a little more. 

D1 Tutorial No. 4 Hale


D2 Tutorial #4 Hines

Wednesday, March 30, 2011

Eric Maynor

D2 Tutorial 4 Nathan Hensley

How to use the Create Gradient Mesh Tool.


First start by creating an object and changing its color.

Then while the object is still clicked go to the Object tap and click Create Gradient Mesh.


A window will pop up that allows you to adjust the size of each individual space that will be applied. For this demo I used 10 rows and 10 columns.


After the mesh has been added you can click the direct select tool to select the individual spaces within the mesh.


When you click on an individual space and change its color it creates a gradient shift in the surrounding spaces to blind the different colors together.


After that hold the shift key and click on multiple spaces. If you don't want the newly colored spaces to touch each other then make sure there is 2 open spaces between each space you click on. Meaning color every forth space.


And the final outcome should look something like my little disco ball here.