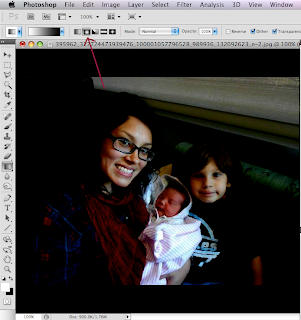
Open a photo and duplicate layer~ go down to the circle with a half blue and white (new adjustment layer) and select curves
This opens the Curves adjustment layer
Next you will adjust the dark
dot over quite a bit
and also bring the one in the middle down
Here comes the Gradient part, it is also the paintbrush tool so you may have to right click to view the gradient tool
At the top select the foreground to background color and press Shift D for default colors which are black and white. Press Shift X to get the black as foreground color.
Now press the circle gradient button
Click once in the middle of the photo and drag out to the edge of photo
The closer or further you extend this will determine how much is to be darkened.
further distance
smaller distance
Before it was adjusted


1 comment:
cool, I didn't realize you could create this effects with curves. I've always just done it manually
Post a Comment