You can start with any shape, but for this tutorial I'll be using squares.

You place 3 squares with different colors, or two if you want a less complex gradient.
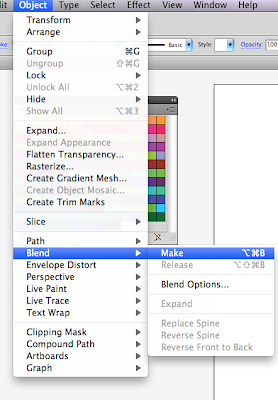
Once you have the squares placed, you will select all of them and then go Object>Blend>Make
It should look something like this

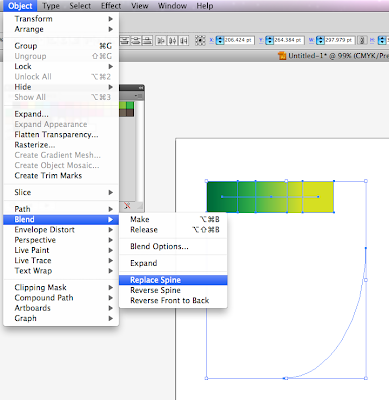
After that you will need to make a path, and once the path is made you will select both the gradient and the path and go to Object>Blend>Replace Spine
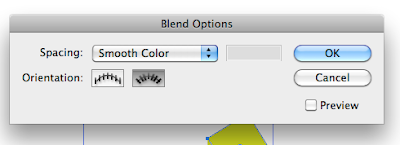
The path may be blocky depending on what shape you used, if it is you will go to Object>Blend>Blend Options then click the align to path button (one on the right)
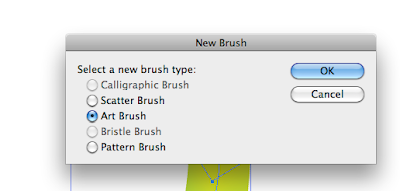
To make the gradient a brush take the blend and drag it into the Brushes panel. Choose “New Art Brush.” You can leave everything in the Art Brush Options box as it is, or experiment with different colorization settings.
Once you've finished that you can select it from the brushes panel and use it just like any other brush!
1 comment:
too bad we cant use things like this for color theory.. haha mixin is frustrating
Post a Comment