D1 Tutorial#1 Portel
How to make a Wicked Awesome Hot Rod Image
In this weak economy not all of us can afford some of the nicer things in life, such as expensive houses, fancy vacations, and other such luxuries. Now days, it’s even too difficult to just simply get a nice car. So, until we all get those awesome jobs and start making those big bucks, one way that we can compensate this is to make a wicked awesome hot rod image to inspire us to get our dream cars.
Step 1.) So the way I did this was by finding an image on-line of the vehicle that I want (68’ Cuda) and saved the image. Some other ways that you can do this is by taking an image of a vehicle with a digital camera and loading it to the computer, or by scanning an image to the computer.
Step 2.) Now that you got the image of the vehicle you want, the next thing that you need to do is apply it to Photoshop. This can be done by finding the icon for the photo you want, then you can drag it the image on to the Photoshop icon. Another way can be by opening Photoshop , then by going into Files, then Open, and then locate your image and open it.
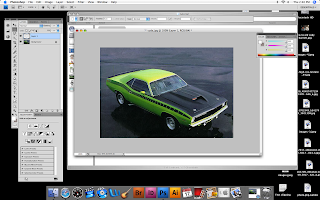
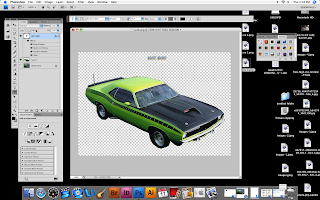
Step 3.) Once in Photoshop, the first thing that you will need to do is click on the Lasso tool. With the lasso tool carefully click around to area of the car. By doing this you can get rid of that pesky boring background.

Step 4.) Now we need to apply a new layer. So go to Layer Icon on the top of the Photoshop tool bar, then click on New, and then Layer.
Step 5.) Now to make this image stand out a bit, we should apply some text above the car. In this case, I choose to go with the word “Hot Rod”. Click on the text icon, and click and drag for the area where you want to text to appear and just type in the wording that you want.

Step 6.) Now to make this image stand out a bit, we should apply some text above the car. In this case, I choose to go with the word “Hot Rod”. You may need to play around with the size of the font, the placement of the word, and the style of font that you want. I choose a Britannic Bold at 36 pt directly above the vehicle.
Step 7.) To make the text stand out a bit, I used the samples tool and found a flashy metallic chrome t style to emboss the letters. This may be accomplished by clicking on the Bevel and Emboss effect in the text effects section, which can be found in your layers toolbar section.

Step 8.) Then I changed the background color to a nice marine blue to let my Cuda swim around in it. To do this all you need to do is apply another layer, click on it with the paint bucket, choose the color that you think is most appropriate, and then click on the background of your image.

Step 9.) Sit back and enjoy your work, maybe make engine sounds of you revving up your engine, or try displaying it at your local car show. It’s yours now have fun with it.
You have just made a totally wicked awesome hot rod image for your enjoyment.
1 comment:
Sooo...basically you cut out the car from the image, added words, and changed the background color?
Post a Comment