1) First place the original icon image in Layer 1 for a reference. Double click on layer 1 and change the following layer options: check LOCK and DIM IMAGES to 50%.


Now you should have something like this

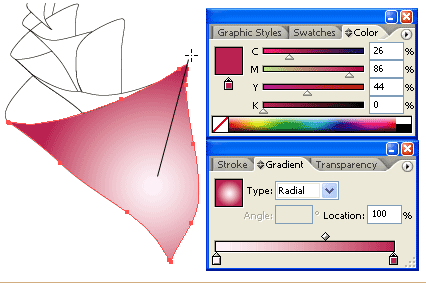
3)Select the top layer and apply a 2 odor radial gradient. Use the tool and drag from the lower center to the top corner, this will help to reposition the gradient.
4) Now in the transparency palette, select the multiply blending mode. Notice this is the see through effect.

5) Select the back shell layer and fill it with another radial gradient, and use the tool to reposition it. Then select multiply blending mode.

6) Select the top layer and fill it with a different color gradient, and select multiply blending mode.

7)Select the rest of the unfilled paths, and use the eyedropper tool to click the rest of the top layer. to copy the gradient fill. you can reposition each gradient.

8) make a entangle box and then apply 25pt round corner (effect- stylize-round corners).

9) no go to effect-stylize-drop shadow and apply the following setting

10) Use the garden too and apply a 3 color gradient as shown

11)To make and inner glow effect you have to add a new stroke, in the appearance palette select add new stroke.

In the appearance palter select the new added stroke fill it with the 4pt stroke, white color. then open the stroke palter and click align stroke to inside.

12) so now well add a white background to the sea shell. first copy the entire sea shell tot he clipboard, then merge the current shell by alt-click and add to shape are (pathfinder palette)

then ctrl+f to paste the copied sea shell in front

now your image is completed.. the first image is the one that i based mine icon off of.

No comments:
Post a Comment