
How To "Make It Rain"
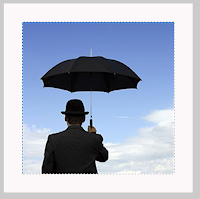
1. Open the picture you want to use and duplicate the layer.
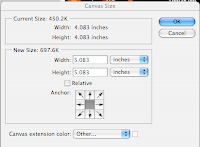
2. We need to add some extra canvas space around the picture, so go to Image --> Canvas Size
and increase the Width and Height by 1 in. (Mine went from 4.083 to 5.083)
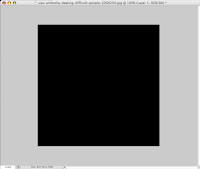
3. Add another new layer and fill it in with black using the paint bucket tool.
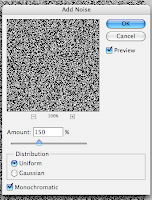
4. Now go to Filter --> Noise --> Add Noise. Adjust the slider to read 150% and make sure that you have "Uniform" and "Monochromatic" selected.
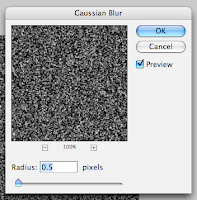
5. Next, we need to add a blur to the image. Go to Filter --> Blur --> Guassian Blur. Adjust the slider to a radius of .05 and click OK to exit
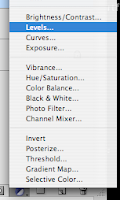
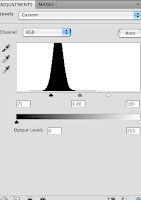
6. Now we want to add an adjustment layer so that we can fix only the noise layer. Hold down the ALT/Option key and click on the Adjustment icon, then select Levels
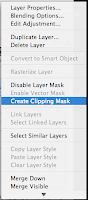
7. You should have a new layer that is labeled Levels. Right click on this layer and select "Create Clipping Mask"
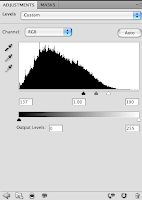
8. With the Levels layer selected, adjust the Black and White sliders so that it looks less like a blurry TV screen and more like stars in the sky.
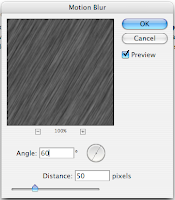
9. Click on Layer 2, and go to Filter --> Blur --> Motion Blur. You can adjust the angle and the pixels however you like ( I adjusted my angle to 60 and my pixels to 50)
10. After doing this, your noise layer might have disappeared. To fix this, go back to your Levels layer and adjust your black and white sliders until you get the contrast that you like.
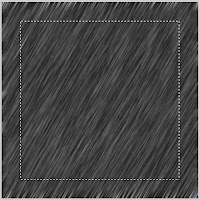
11. Now we need to crop away the extra space around the edges that we added earlier. Click on your "Duplicate" layer and, using the crop tool, select the area around your image.
12. Go back to your Levels layer and you should be able to see the selection as shown below
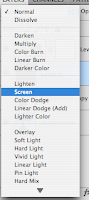
13. Almost done. Click on the Noise layer and change the blending mode to "Screen"
and you have your final product. :)
1 comment:
this would really helpful in a lot of different applications!
Post a Comment